The Flow tab is the heart of your project in XQuiz. This is where you’ll create pages, organize the funnel logic, and build the path that your user will follow.Documentation Index
Fetch the complete documentation index at: https://docs.xquiz.com.br/llms.txt
Use this file to discover all available pages before exploring further.
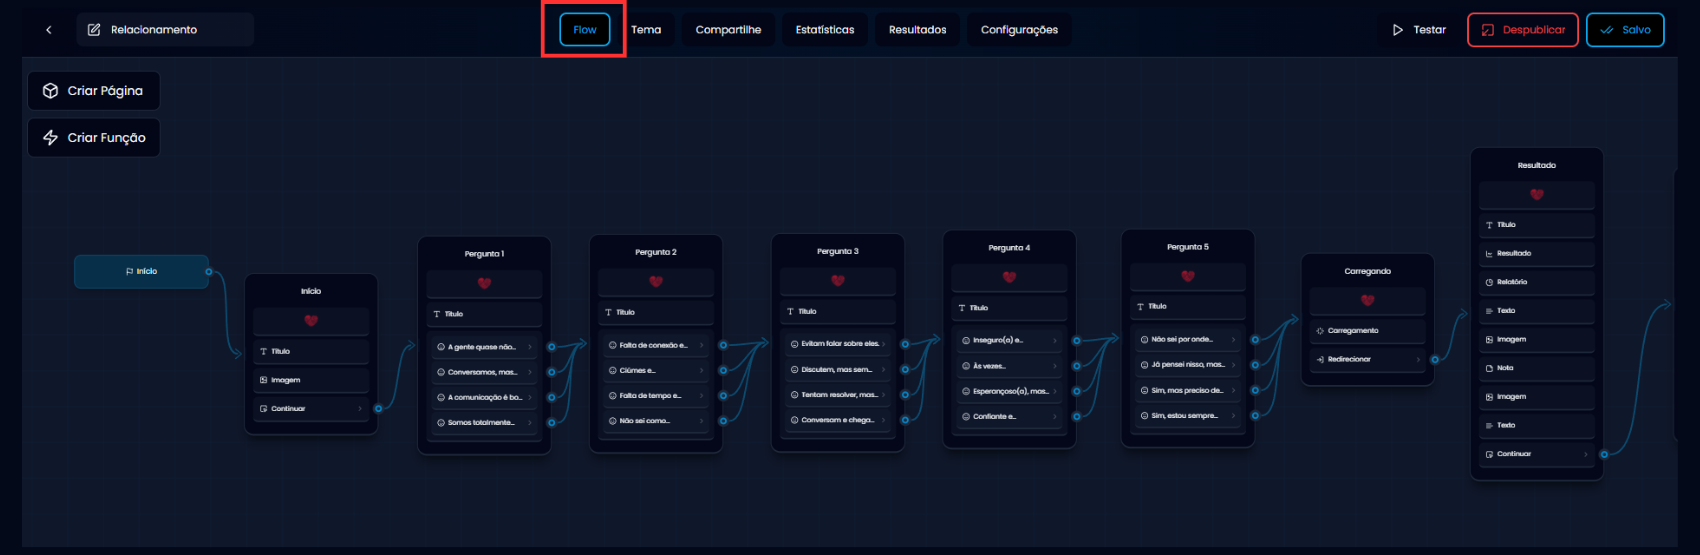
What you can do in Flow
- Create new pages (questions, captures, results, etc.).
- Add logical functions (conditions, variables, automatic actions).
- Connect pages visually by dragging the arrows.
- View the entire flow of your funnel in one place.
- In the center of the screen you’ll see the “Start” block.
- From there, you can click “Create Page” or “Create Function” in the left sidebar menu.
- Each new element created appears as a block that you can move throughout the flow area (to move, just click, hold, and drag the blocks) and connect with others.
- Use the connection lines to control the order and path that the user will follow.
Flow zoom and visualization controls
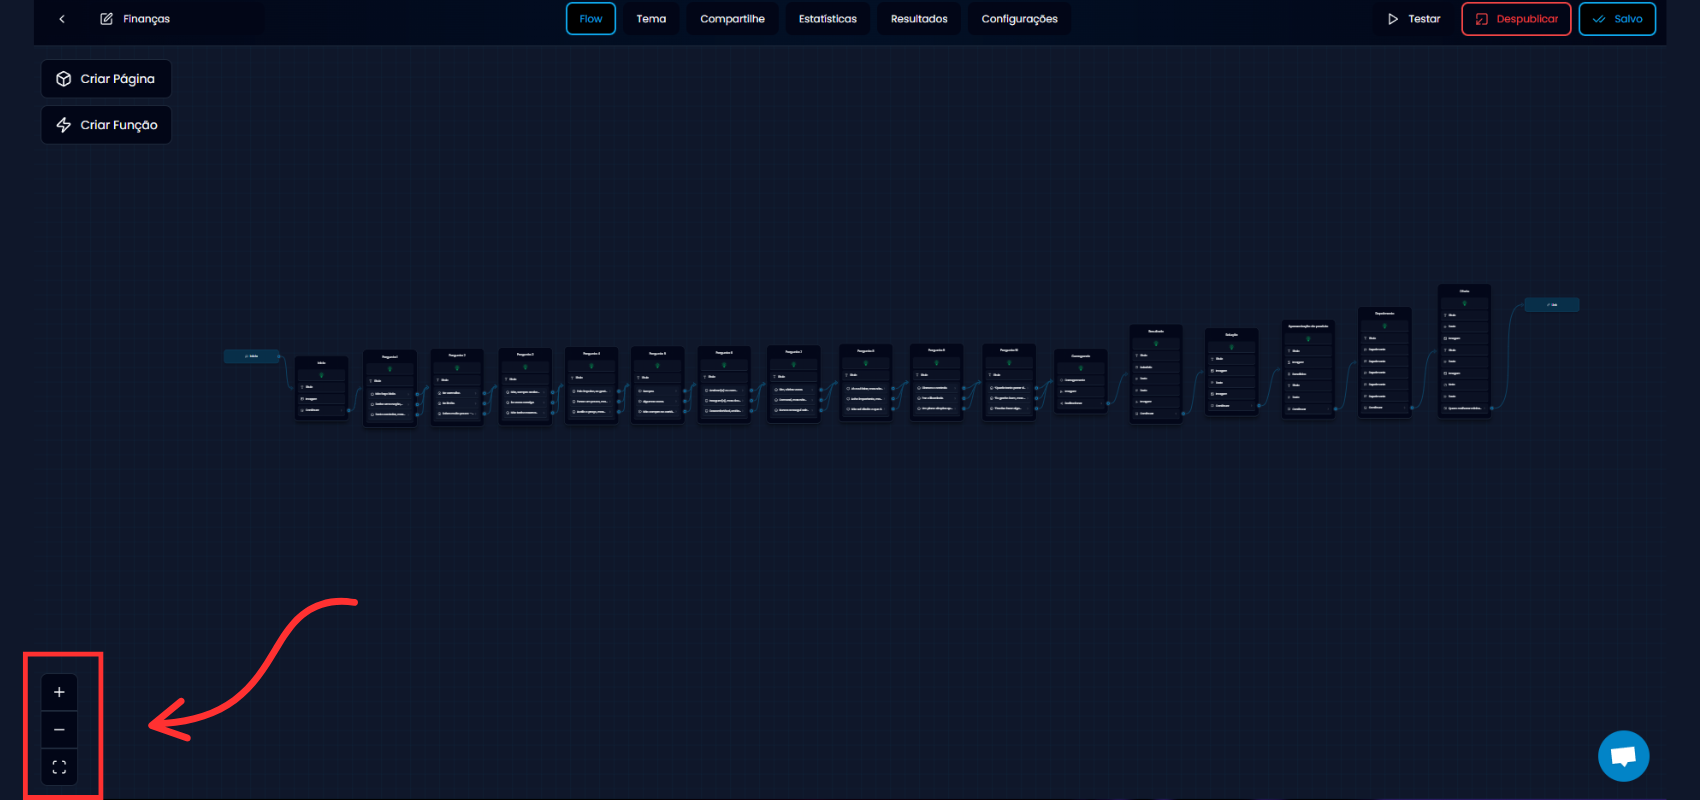
- Plus (+): Increases zoom to see blocks up close.
- Minus (−): Decreases zoom to view the funnel more broadly.
- Square (center): Recenters the view and takes you back to the beginning of the flow.
- Scroll up to ➝ zoom in.
- Scroll down to ➝ zoom out.
Renaming your project
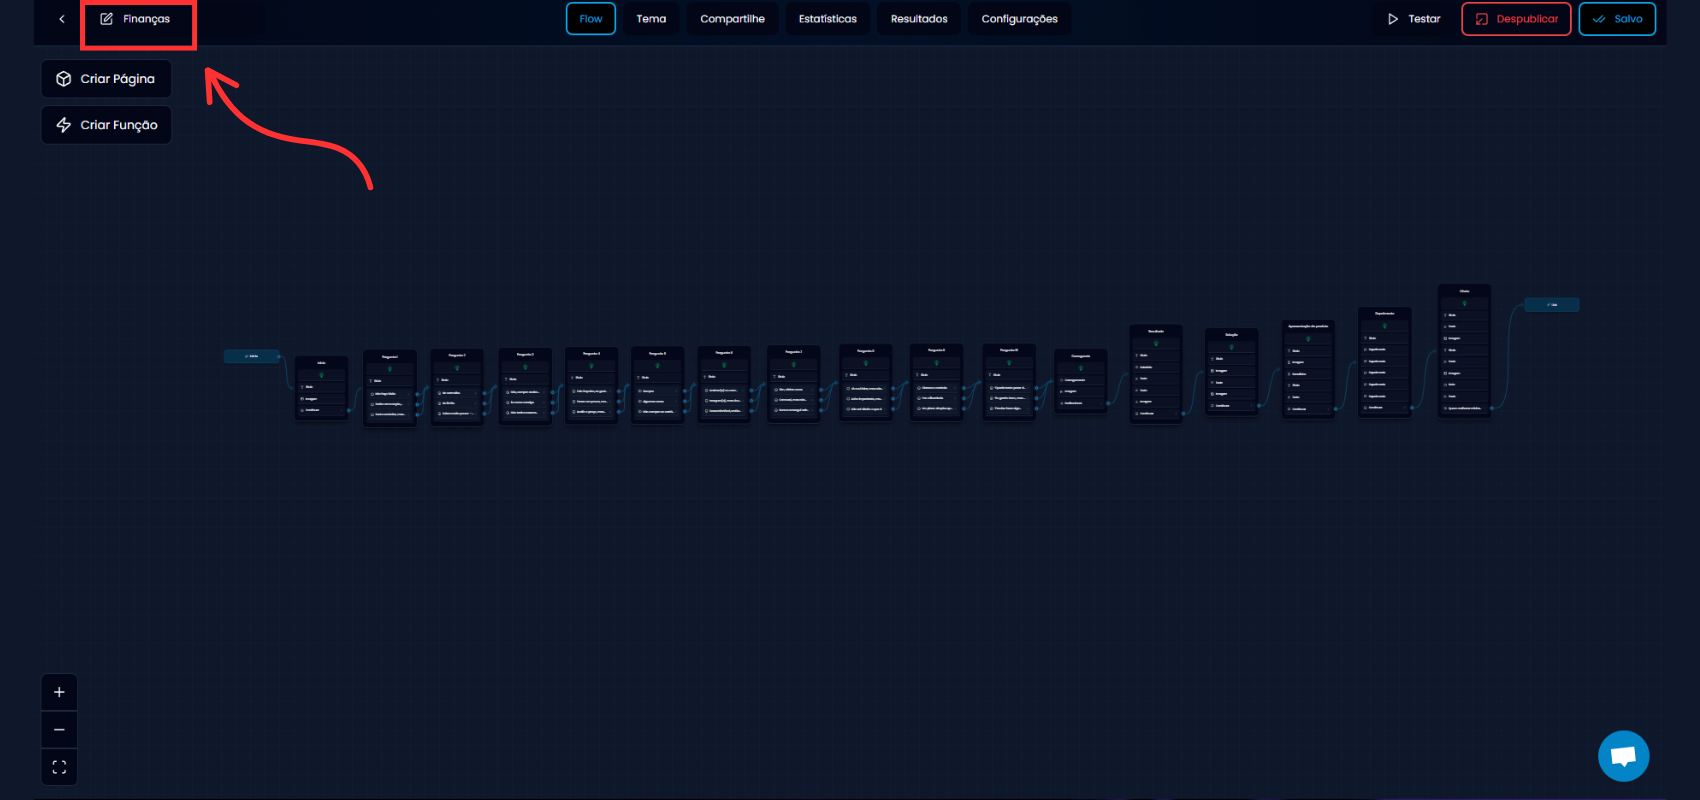
- Click on the “New Project” text.
- The field will become editable.
- Type the name you want for your project (e.g., “Lead Capture Funnel”).
- Delete everything except one letter.
- Type the new name normally.
- Then, delete the remaining letter at the beginning.
Main Buttons
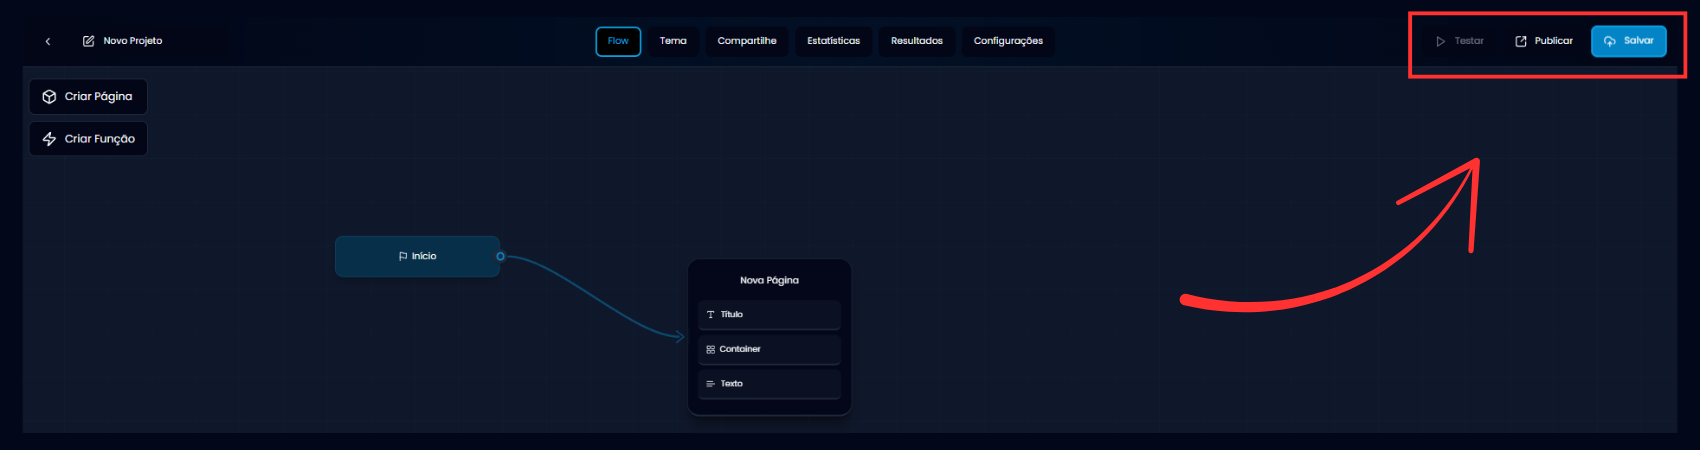
Save
- Saves all changes made to your project, such as texts, logic, style, and settings.
- Always click Save before leaving or publishing, to ensure nothing is lost.
- It’s important to click Save frequently during quiz creation!
Publish
- This button puts your quiz online, generating public links and allowing anyone to access it.
- You need to publish the quiz to be able to use the “Test” button.
- After publishing, you can still make adjustments and click Save to update the changes.
- If you want to pause public display, you can unpublish at any time.
Test
- Allows you to simulate the quiz as if you were a visitor.
- Navigation between questions.
- Layout appearance.
- If the funnel logic is working correctly.